
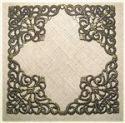
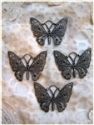
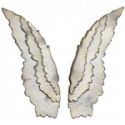
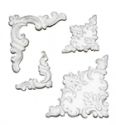
 I used fabulous metal filigree corners and butterfly, painted with white acrylic paint along with layers of gorgeous trims. There is large, die cut butterfly under the metal one. It is made from vellum, dry brushed at the edges which gives them definition and makes them curl...
 At the top of the spine, I added a Tim Holtz embellishment and a triple looped bow...
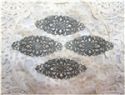
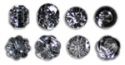
 A trail of rhinestones follow the butterfly...
 And the distressed damask design of the cover paper looks beautiful against the white trims...
 Some single rhinestones just happened to fall on the metal filigree butterfly. You just might be able to see a line of iridescent white glitter that edges the vellum wings...
 I dry brushed all the edges of this album as well. You can see that I use a lot of white paint! There is also a half pearl on the corner bracket, well fixed with a drop of glossy accents...
 This is the first page it opens to. Tags fit behind the front fold and also behind or into the diagonal side folds....
 Each page in this collection is double sided, giving you lots of choices. This page opens to a diagonal on the left and no fold on the right. I think the embellishments for this mini album have really just begun! An afternoon in my craft room should give way to lots of little 'finds' that will go into this, along with distressed and dry brushed edges and embellishments on all of the tags!...
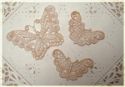
 This delightful little resin cameo found it's way onto a butterfly appliqué...
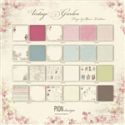
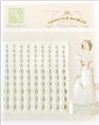
 Each page from this Pion paper collection, has a strip along one side that can be cut away and used in your project. It has a reversible design as well...
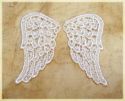
 I reversed the folds on this page...it's the opposite of the second page. This time the diagonal fold is on the right and no diagonal on the left. I just love those appliquéd wings and love the way they show out of the closed album...
 The last set of pages are in neutrals. You may recognize the lace and burlap flower from this tutorial...
 The back cover of this album is finished, but quite simple. It's a personal peeve when a book won't lie flat.
Now it's on to the 'how-to's' of this style of album. If you haven't already stopped for a drink, now would be a good time. Grab a sacrificial piece of 12 x 12" paper (or two), so you can follow along...
The back cover of this album is finished, but quite simple. It's a personal peeve when a book won't lie flat.
Now it's on to the 'how-to's' of this style of album. If you haven't already stopped for a drink, now would be a good time. Grab a sacrificial piece of 12 x 12" paper (or two), so you can follow along...
 Begin by deciding which side of the paper you want to show and lay it face up. Take the bottom edge and fold it to meet the top edge. Make a crease with a bone folder or your fingers. Either way, you want a sharp crease...
 Above, I opened the paper after making the width-wise fold...
 Take the bottom edge of the paper and fold it down this time, so the bottom edge is in line with the middle fold line. Make another sharp crease...
 Above, is how it will look with the second fold in place. All you see is the right side of the paper...
 The view above is from the left side of the paper. The two folds that you have made, form a sort of flattened S shape...
 Now, it's time to make the diagonal folds...if you want them. Grab the folded corner (you will have two thicknesses in your hand) and fold them down so that the side edge is even with the bottom edge. It will take a bit of forcing with most papers, but just don't rush. A bone folder really helps to crease these resistant folds. If you don't own one, perhaps the handle of a pair of scissors could be used or some other improvised tool with a rounded edge and without a painted finish that could rub off...
 When you open up this newest fold, it will look like the sample above...
 The next step is to reverse the direction of these folds. What was a valley, becomes the mountain and visa versa...
 Repeat these steps on the opposite edge..
 Whose horribly wrinkly finger is that!! and Where's the hand cream?
 The above photo shows the folds reversed...
 The next step is to place some paper glue (I'm a fan of Scotch Quick Dry Adhesive) along the inside bottom edge of the corner fold and press. Repeat this step on the other side...
 The view from the bottom of your page should look like the one above. Now run a thin line of adhesive between these layers, close to the bottom edge, to secure it closed...
 Give the paper ample time to dry before the next step. Now you want to fold the left edge of the paper to the right edge. This creates the center fold for the page. Once again, take your time coaxing the fold, making sure your edges are lined up, then sharpening the crease...
 At this point, the page can be used as is, or if you prefer, you will run a line of glue down the center fold of the bottom portion to glue it into place. You can see where I ran a bead of glue in the photo below...
 There are times when more is not better and this is one of those times. Too much adhesive will just get messy...
 This is a finished page (two pages actually). I used five folded pages along with two pieces of medium weight chipboard (6"x6") for the covers...
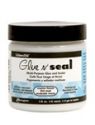
 Prepare your covers by adhering a 6"X6" piece of patterned paper to each. I use Glue N' Seal and am thoroughly happy with the result. One coat applied with a foam brush to the chipboard makes certain the paper stays put. After that has dried, a second coat to the surface ensures the cover has longevity. The matte version really does disappear and doesn't have the sticky surface that I've found with other brands. Before applying the top coat, be certain to apply any edge finish you desire. I used white acrylic paint, swiped along the edges with a dauber (it doesn't get faster than that) and also onto the edges of the inside pages...
 Using double stick tape, apply it around the edge of the unfinished side of each chipboard cover. Carefully, attach the cover to the back side of the first left page. It should fit the cover from edge to edge. The next step is to place double sided tape on the remaining pages, on the back side of the left of each page. It is important to move the tape a half an inch away from the center fold. You will need that loose, unconnected space to allow the album to 'grow' as you add photos, lists, tags, etc...
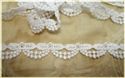
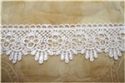
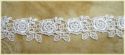
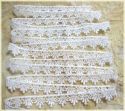
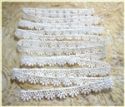
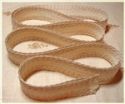
 When it is all assembled, it will look like the photo below. Below, you are looking down at the spine of the album. Notice that the covers are attached all the way to the edges of the page, but the inner pages have that half inch of space. At this point, as you think about embellishments, give some thought about the spine itself. On this album, I used some lace trims to cover the spine. Ribbons, leather, faux furs or flowers can be adhered to disguise (and strengthen) this functional part...
 I hope you have fun customizing your mini album. In addition to your choice of papers, think about tags, trims and all those treasured bits you've got stashed away for a 'someday' project. Perhaps, someday is here and those gorgeous bits will find a home in an album you will enjoy for many years.
with BIG tired ((hugs)),
Rebecca
 |  |  |  |  |
 |  |  |  |  |
 |  |  |  |  |
 |  |  |  |  |
 |  |  |

This is incredibly beautiful Rebecca. I will most definitely be giving this a go. Awesome sauce!! Jenny x
ReplyDeleteThanks Jenny~ Hope you enjoy this one as much as I have! ((hugs)) Rebecca
DeleteAbsolutely stunning Rebecca ! Fabulous step by step and gorgeous project overall ! Sue C x
ReplyDeleteHi Sue~ Thanks so much for your really sweet comment! ((hugs)) Rebecca
DeleteThis is soooooo gorgeous, stunning and vervy very beautiful. Love this work.
ReplyDeletelovely greet
Marja
Hi Marja~ Dank u voor het verlaten van een dergelijk soort reactie! ((hugs)) Rebecca
DeleteI love this project! I'm definitely going to use your very detailed instructions to create an album of my own!
ReplyDeleteHi Maryanne~ I hope you have a great time with it. If you would like to share, I would LOVE to see what you create with it!! ((hugs)) Rebecca
DeleteWOW absolutely stunning Rebecca!!! Gorgeous lace and colors!
ReplyDeleteHave a great weekend!
Diana
Hi Diane~ Thanks for your very generous comment! I appreciate it. ((hugs)) Rebecca
DeleteTotally delightful shabby chic project! Love the colors and the delicacy of it as well as the wonderful design!
ReplyDeleteHugs,
Linda
Hi Linda~ thank you...just remembered that I have to get some info to you!!! ((hugs)) Rebecca
DeleteThis is so elegant, and has some of my favorite things: lace, beautiful ribbon and gorgeous paper, lots of detail. Maybe I might try this, your instructions seem very clear.
ReplyDeleteHi Marci, I hope you give it a go...it really is quick and simple, but looks complicated! That's my favorite combination with paper crafting and cooking ;)) ((hugs)) Rebecca
DeleteForgot to say, it's absolutely exquisite!!!
ReplyDeleteA beautiful mini album creation. Just nned to go and buy some 12" x 12" papers now! Hugs Mrs A.
ReplyDeleteHello and thank you! If you haven't worked with them yet, my two favorite companies right now are Pion Designs and Maya. Linda carries both lines in the Funkie Junkie Boutique and they are absolutely stunning. Let me know how it goes! ((hugs)) Rebecca
DeleteThis is absolutely amazing! I'm not certain that I could duplicate the procedure, but I just might try! Beautiful!
ReplyDeleteHi Evelyn, Thanks for the comment...I hope you give it a try! If you encounter any difficulty, let me know. I'm happy to help. ((hugs)) Rebecca
DeleteBlue is my favorite color, and this is the most beautiful album I've ever seen. I have to try it. Thank you!
ReplyDeleteWow Sue~ thank you for the sweet comment! You can do it and if you need any help, just let me know. ((hugs)) Rebecca
DeleteWow! Is all I can say. Your album is absolutely gorgeous. Everything about it is perfection...the colors, the lace, the papers. What a beautiful gift for a bride and groom it would make. Thank you for sharing your technique and after the holidays this is on my project list. Of course, after reading the technique about a dozen times and destroying at least 5 sheets of "sacrifice" papers...lol. Just gorgeous!
ReplyDeleteThanks Sande~ If you can't get it to work, let me know. I'll do my best to get you over and 'bump'! ((hugs)) Rebecca
DeleteEnchantingly pretty, Rebecca - and what a fabulous step-by-step too - thank you so much!
ReplyDeleteAlison x
So kind of you Allison~ ((hugs)) Rebecca
DeleteAbsolutely fabulously made Rebecca I just loveeeeeeeeeeeee your step by step wowwwzerss Hugs Terry xxxx
ReplyDeleteTerry, you're so kind~ thank you ((hugs)) Rebecca
DeleteHow in the nine do I get ahold of that lace on the spine? its the only thing you have't mentioned, its even in the front page, This whole thing knocks my socks off, but that lace in particular is probably the prettiest I've ever seen. even an image by itself just to look at would be fantastic.
ReplyDelete